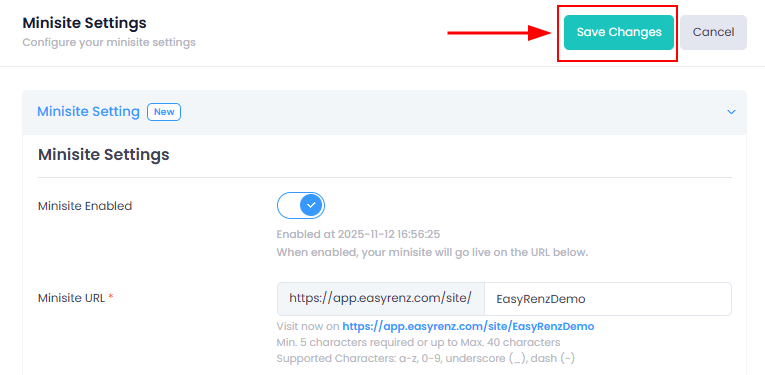
1.1 Visit Minisite Setting Page
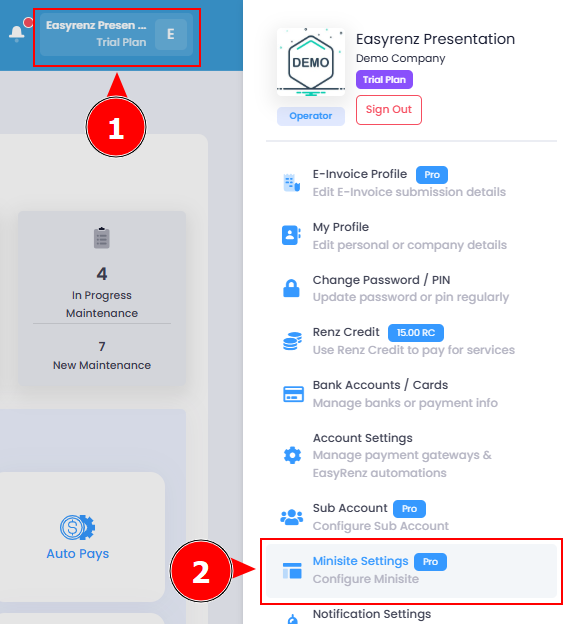
You can access minisite setting page via the app drawer by clicking on your account name on top right of the header.
1.2 Fill Up Minisite Setting Fields
This section explains each minisite setting field and the type of data you need to fill in.
Minisite Enabled
💠This toggle controls whether your minisite are being shown publicly or not.
Minisite URL
💠This field determines the final url for the public to visit your minisite page.

Site Header Color
💠This color picker field determines the header color of your minisite pages.
💠It is recommended to follow the background color of your company logo for better site viewing experience.
Site Header Logo
💠The header uploaded will be displayed on the header of your minisite pages.
💠The header uploaded will also be used as watermark for the property photo and unit photo uploaded.
💠It is recommended to upload a 4:1 aspect ratio image as header logo to prevent image stretching issues.
Company Site URL
💠 The URL should be your company site url.
💠 This URL will be shown as a button located at the right side of your minisite header.
💠 The button color is not customizable and will automatically use the inverted color of your selected header color.
Reservation Approval In Days
💠 Number of days for guest to expect the reservation approval.
Vacant Room Preparation Days
💠 Number of days for vacant room to be available to check in from previous check out.
Minisite Custom Question
💠 Questions that will be shown to customer when they book a vacant unit.
Privacy Policy URL
💠 Your privacy policy for tenant to accept when making reservation.
Terms and Condition URL
💠 Your terms and condition for tenant to accept when making reservation.
1.3 Save your minisite setting changes.
Remember to scroll up the page and save the changes after you done configuring to prevent data loses.